Top Products
VIEW ALL RESULTS
Yoga has evolved far beyond being just another fitness trend. For millions of people worldwide, yoga has become a complete lifestyle that improves physical health, mental clarity, emotional balance, flexibility, posture, strength, recovery, and overall well-being. While many people initially begin yoga simply to improve flexibility or reduce stress, they often discover that the practice gradually transforms many aspects of life far beyond physical fitness.
Modern lifestyles have become increasingly demanding. Long working hours, sedentary office routines, poor posture, digital distractions, stress, anxiety, irregular sleep patterns, and physical inactivity are now common parts of daily life. As people search for healthier ways to manage stress and improve their overall wellness, yoga continues becoming one of the most effective and sustainable solutions.
Unlike high-intensity workouts that focus mainly on calorie burning or physical transformation, yoga creates balance between the body and mind. It improves movement while also supporting emotional wellness, recovery, breathing, focus, mindfulness, and long-term physical health.
At Lifetimefitnessstore, fitness is not only about intense workouts or physical performance. True wellness also includes recovery, flexibility, movement quality, mindfulness, posture improvement, and sustainable healthy living. Yoga plays a major role in creating that balance.
Today, yoga is no longer limited to studios or specialized classes. More people are building yoga-friendly wellness spaces at home using premium yoga mats, recovery tools, stretching equipment, resistance accessories, massage solutions, and smart home fitness systems that support overall well-being.
The truth is that yoga can absolutely transform your life, but not in the unrealistic way social media often portrays it. Yoga is not magic, nor is it an overnight solution. Its transformation happens gradually through consistency, discipline, movement, breathing, and awareness. Over time, these small improvements create major physical and mental changes that positively affect nearly every aspect of life.
Many people misunderstand yoga as simply a stretching workout. In reality, yoga is much deeper than flexibility training. Yoga is a practice that combines physical movement, controlled breathing, body awareness, and mindfulness to create harmony between the body and the mind.
The purpose of yoga is not only to make the body flexible. It is to improve the overall quality of life. Yoga teaches people to slow down, breathe better, move with control, and become more aware of their physical and emotional well-being.
Modern yoga practices may vary greatly depending on style and intensity. Some forms focus more on relaxation and recovery, while others challenge strength, endurance, and balance.
Popular yoga styles include:
Each style offers unique benefits depending on individual fitness goals and wellness needs.
For some people, yoga becomes a form of recovery after intense gym workouts. For others, it becomes a daily mental reset that helps reduce stress and improve emotional balance. Some individuals use yoga to improve posture and flexibility, while others use it to support weight management and cardiovascular wellness.
This versatility is one of the reasons yoga continues becoming more popular worldwide.
One of the biggest reasons people start yoga is to improve physical wellness. Modern lifestyles often create stiffness, poor posture, muscle tightness, and reduced mobility due to long sitting hours and lack of movement.
Consistent yoga practice gradually improves:
Unlike traditional workouts that often isolate muscles individually, yoga trains the body as one connected system.
Yoga movements activate stabilizing muscles that are often ignored during regular gym workouts. These smaller muscles play a major role in maintaining proper posture, balance, and injury prevention.
Many people who spend long hours sitting at desks notice significant improvements in:
after practicing yoga consistently.
Yoga also improves blood circulation throughout the body, helping muscles recover more effectively after workouts or long workdays.
At Lifetimefitnessstore, recovery and mobility remain important parts of complete wellness lifestyles, which is why yoga and recovery equipment continue becoming essential additions to modern home fitness spaces.
Flexibility is often ignored in modern fitness culture. Many people focus only on strength training, weight loss, muscle building, or cardio workouts while neglecting mobility and movement quality.
Poor flexibility can negatively affect:
Tight muscles create imbalance throughout the body, increasing strain on joints and limiting proper movement patterns.
Yoga helps lengthen tight muscles while improving overall range of motion. This becomes especially important for people who regularly use:
because repetitive movement patterns can gradually create muscular tightness.
For example:
Yoga helps counterbalance these effects by improving flexibility and restoring healthier movement patterns.
One of yoga’s most powerful benefits is its positive effect on mental wellness.
Modern lifestyles expose people to constant stress, anxiety, digital overload, emotional fatigue, and mental burnout. Many individuals feel continuously overwhelmed by work pressure, social expectations, lack of sleep, and unhealthy routines.
Yoga creates a mental reset through controlled breathing, mindful movement, and relaxation techniques.
The practice helps reduce cortisol levels, which are closely linked to stress and anxiety. At the same time, yoga encourages relaxation and emotional balance by calming the nervous system.
Many people who practice yoga regularly notice improvements in:
Yoga encourages mindfulness, helping individuals stay more present rather than constantly distracted by stress and overthinking.
This emotional balance often improves overall quality of life beyond physical fitness alone.
Breathing is one of the most important yet most overlooked aspects of health and fitness.
Most people unknowingly develop shallow breathing patterns due to stress, anxiety, poor posture, and sedentary routines.
Yoga teaches controlled breathing techniques that improve:
Proper breathing techniques also improve performance during:
Controlled breathing helps activate the parasympathetic nervous system, which supports recovery and relaxation.
This is one reason many athletes and fitness enthusiasts now integrate yoga into their wellness routines alongside intense training sessions.
Recovery has become one of the most important aspects of modern fitness. Many people train intensely but completely ignore recovery, which often leads to:
Yoga helps improve recovery by reducing muscle tension, improving circulation, supporting mobility, and lowering stress levels.
Recovery-focused yoga sessions are especially beneficial for individuals using:
Yoga helps muscles relax while improving flexibility and movement quality.
Many athletes now use yoga specifically for recovery because it allows the body to heal more efficiently while maintaining mobility and reducing stiffness.
Contrary to popular belief, yoga and strength training work extremely well together.
Strength training builds power and muscle mass, while yoga improves:
This combination creates a far more balanced fitness lifestyle.
For example:
Tight hips from squats improve through yoga stretches
Shoulder stiffness from upper-body workouts reduces through mobility-focused poses
Core stability improves significantly through yoga balance movements
Yoga also helps improve body awareness, allowing people to perform strength exercises with better posture and technique.
At Lifetimefitnessstore, many people combine yoga with treadmills, cross trainers, exercise bikes, and strength systems to create more complete and balanced home fitness routines.
Home wellness spaces continue becoming increasingly popular because people now prioritize convenience, privacy, comfort, and long-term consistency.
Creating a yoga-friendly workout environment at home does not require excessive space. Even a small dedicated wellness corner can create a calming and motivating atmosphere.
Important yoga and wellness products include:
These tools improve both comfort and effectiveness during yoga sessions.
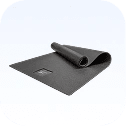
High-quality yoga mats provide better grip, cushioning, stability, and joint protection during stretches, balance poses, and floor exercises.
Recovery tools such as foam rollers and massage guns help reduce muscle tightness after yoga or strength workouts.
Yoga may not burn calories as aggressively as high-intensity cardio workouts, but it still plays a highly valuable role in weight management.
Yoga supports healthier body composition by:
Stress often contributes significantly to unhealthy eating patterns and weight gain. Yoga helps reduce emotional stress while promoting healthier routines and emotional control.
More active forms such as Power Yoga and Vinyasa Yoga can also provide effective calorie-burning workouts while improving flexibility and endurance simultaneously.
When combined with:
yoga becomes a powerful complement to long-term weight management.
Poor posture has become increasingly common due to:
Poor posture can lead to:
Yoga strengthens stabilizing muscles while improving spinal alignment and body awareness.
Over time, yoga helps people naturally maintain better posture throughout daily life.
Improved posture not only enhances physical appearance but also improves confidence, breathing quality, and movement efficiency.
Sleep quality directly affects recovery, mood, energy, focus, hormonal balance, and overall health.
Unfortunately, modern lifestyles often create poor sleep habits due to:
Yoga helps improve sleep through relaxation-focused movement and breathing techniques that calm the nervous system.
Even short evening yoga sessions can:
Better sleep eventually improves every aspect of physical and mental performance.
One of yoga’s greatest strengths is sustainability.
Unlike extreme fitness programs that often cause burnout or inconsistency, yoga adapts to different:
This flexibility makes yoga highly sustainable throughout different stages of life.
Modern wellness lifestyles now combine yoga with:
Together, they create complete wellness ecosystems supporting both physical and emotional well-being.
At Lifetimefitnessstore, people continue integrating yoga practices alongside premium cardio equipment and smart home gym systems to create balanced and healthier lifestyles.
Yoga is far more than just stretching or relaxation. It is a complete wellness practice that improves flexibility, recovery, posture, emotional balance, mobility, strength, breathing, and overall quality of life.
The transformation yoga creates is not instant, but it is incredibly powerful over time. Through consistent practice, yoga helps people move better, recover faster, sleep deeper, think more clearly, and live healthier lifestyles.
When combined with premium fitness equipment such as treadmills, cross trainers, rowing machines, recovery systems, and home gym solutions, yoga becomes part of a complete fitness lifestyle focused on long-term health and balance.
At Lifetimefitnessstore, the journey toward better wellness continues through premium fitness equipment, yoga accessories, recovery tools, and smart home fitness solutions designed to support healthier and more balanced lifestyles.
The truth is simple: yoga can absolutely transform your life, not by changing everything overnight, but by helping you become healthier, calmer, stronger, and more connected to yourself every single day.
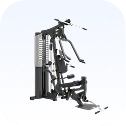
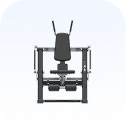
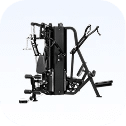
If you are looking to buy other fitness machines or accessories, look no further! Explore our range of fitness products like treadmills, elliptical cross trainers, exercise bikes, rowing machines, home gym, functional trainer, multi-station, power towers, smith machines, dumbbells, foosball tables, pool tables, and table tennis.
Weight training has evolved far beyond the stereotype of bodybuilders lifting heavy weights in crowded gyms. Today, it is recognized as one of the most effective forms of exercise for improving overall health, building strength, enhancing physical appearance, and increasing quality of life. Whether your goal is to lose weight, gain muscle, improve athletic performance, or simply feel healthier, weight training can be a powerful tool to help you get there.
Many beginners are intimidated by the idea of lifting weights. They worry about using the wrong technique, getting injured, or not knowing where to start. Others believe that weight training is only for young athletes or people who want to build large muscles. In reality, weight training is suitable for almost everyone, regardless of age, gender, or fitness level. One of the most exciting aspects of weight training is that its benefits extend far beyond physical appearance. Regular resistance training can improve mental health, boost confidence, increase energy levels, strengthen bones, support heart health, and help maintain independence as you age.
If you are considering starting a weight training journey, understanding the basics can help you build a strong foundation and achieve sustainable results. This guide covers everything beginners need to know, from the benefits of strength training to proper workout structure, common mistakes, and essential equipment.
What Is Weight Training?
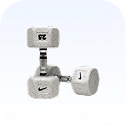
Weight training, also known as resistance training or strength training, involves performing exercises against resistance to challenge your muscles. This resistance can come from various sources, including free weights, machines, resistance bands, body weight, or cable systems. Dumbbells are among the most popular and beginner-friendly strength training tools, allowing users to perform a wide range of exercises that target both major and stabilizing muscle groups. When muscles are challenged through resistance, tiny microscopic tears occur within muscle fibers. During recovery, the body repairs these fibers and makes them stronger, allowing the muscles to adapt and grow over time.
This process leads to improvements in:
•Muscular strength
•Muscular endurance
•Muscle size
•Bone density
•Joint stability
•Athletic performance
•Metabolic efficiency
•Overall fitness
Weight training is not simply about lifting heavier weights. It is about progressively challenging the body to become stronger and more resilient.
Modern lifestyles often involve long hours of sitting, reduced physical activity, and increasing levels of stress. These habits contribute to muscle loss, poor posture, reduced mobility, and a higher risk of chronic disease. Weight training helps counteract many of these challenges by preserving and building muscle mass while improving functional movement.
Regular strength training can help:
•Improve posture
•Increase daily energy levels
•Reduce injury risk
•Support healthy aging
•Improve mobility
•Enhance physical performance
•Boost confidence
•Increase independence
Unlike many forms of exercise that primarily focus on calorie burning, weight training creates lasting physical adaptations that continue to provide benefits long after the workout is complete.
For many people, the answer is yes.
The benefits of weight training often extend beyond the gym and into everyday life. Tasks such as carrying groceries, climbing stairs, lifting luggage, playing with children, and maintaining good posture become easier as strength improves.
Weight training can positively impact:
•Physical health
•Mental well-being
•Self-confidence
•Body composition
•Work performance
•Sports performance
•Stress management
•Long-term health outcomes
Many beginners start lifting weights to improve their appearance but quickly discover improvements in energy, focus, discipline, and overall quality of life.
Strength is one of the most obvious benefits of resistance training. As your muscles adapt to progressively heavier loads, everyday activities become easier and more manageable. Improved strength also enhances performance in sports and recreational activities.
Building lean muscle mass improves body composition and contributes to a stronger, more athletic appearance.
Muscle development can help:
•Improve posture
•Increase stability
•Support healthy joints
•Enhance physical performance
•Boost metabolism
Muscle tissue requires energy to maintain. As muscle mass increases, the body burns more calories throughout the day, even during periods of rest. This makes weight training highly beneficial for long-term weight management.
Strength training places healthy stress on bones, encouraging them to become stronger over time.
Benefits include:
•Improved bone density
•Reduced risk of osteoporosis
•Stronger skeletal structure
•Lower fracture risk
This becomes especially important as individuals age.
Strong muscles support and protect joints.
Weight training can improve:
•Knee stability
•Hip function
•Shoulder health
•Ankle strength
•Overall movement quality
Proper training often reduces the likelihood of injuries during daily activities and sports.
The effects of strength training are not limited to the body.
Many people experience significant mental health improvements after incorporating resistance training into their routine.
Benefits include:
•Reduced stress
•Improved mood
•Greater confidence
•Increased self-esteem
•Better focus
•Improved discipline
•Reduced anxiety
Completing challenging workouts and achieving measurable progress can create a strong sense of accomplishment that carries into other areas of life.
Weight training benefits anyone seeking improved health, strength, and fitness.
Women naturally have lower testosterone levels than men, making it difficult to develop excessive muscle mass without highly specialized training and nutrition.
While cardio burns calories, weight training helps preserve muscle and improve metabolism, making it an essential part of any weight management plan.
Strength training is highly beneficial for older adults because it helps preserve muscle mass, maintain mobility, and support independence.
Proper technique and progressive overload are far more important than lifting the heaviest possible weight.
Progressive overload is the principle of gradually increasing the demands placed on the body.
This can be achieved by:
•Increasing weight
•Adding repetitions
•Increasing training volume
•Improving exercise difficulty
•Reducing rest periods
Without progressive overload, the body eventually adapts and progress slows. Consistently applying this principle is one of the most important factors for long-term success.
Beginners should focus on compound movements that engage multiple muscle groups simultaneously.
Examples include:
•Squats
•Deadlifts
•Bench Press
•Overhead Press
•Rows
•Pull-Ups
•Lunges
•Hip Thrusts
•Push-Ups
•Lat Pulldowns
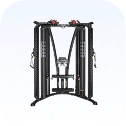
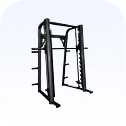
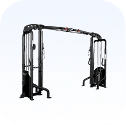
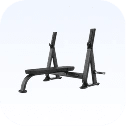
These exercises build strength efficiently and provide the greatest overall benefits. Among the most versatile strength-training equipment available today are functional trainers, which allow users to perform a wide variety of resistance exercises targeting multiple muscle groups through adjustable cable systems.
A common mistake is doing too much too soon.
For most beginners:
•2 to 3 sessions per week is ideal initially
•Focus on full-body workouts
•Allow recovery between sessions
•Prioritize consistency over intensity
Building a sustainable routine is far more important than trying to train every day.
Muscles grow during recovery, not during workouts.
Recovery strategies include:
•Quality sleep
•Proper hydration
•Balanced nutrition
•Stress management
•Rest days
Ignoring recovery often leads to fatigue, poor performance, and increased injury risk.
Nutrition plays a critical role in determining how effectively your body responds to weight training. While workouts provide the stimulus for muscle growth and strength development, proper nutrition provides the resources needed for recovery and adaptation. Many beginners focus heavily on training while overlooking nutrition. This often limits progress and slows recovery.
A balanced nutrition plan should include:
•Lean protein sources
•Complex carbohydrates
•Healthy fats
•Fruits and vegetables
•Adequate hydration
•Consistent meal timing
Protein is especially important because it provides the building blocks needed to repair and build muscle tissue. Good protein sources include chicken, fish, eggs, dairy products, legumes, and lean meats. Carbohydrates serve as the body's primary energy source and help fuel intense training sessions. Whole grains, fruits, vegetables, and rice are excellent options. Healthy fats support hormone production, joint health, and overall recovery. Sources include nuts, seeds, olive oil, avocados, and fatty fish. Rather than following restrictive diets, beginners should focus on creating sustainable eating habits that support their training goals.
Protein requirements vary depending on activity level, body weight, and training intensity. For most individuals engaged in regular weight training, consuming adequate protein throughout the day supports muscle recovery and growth.
Benefits of sufficient protein intake include:
•Improved muscle recovery
•Greater strength gains
•Enhanced muscle development
•Reduced muscle breakdown
•Improved workout performance
Spreading protein intake across multiple meals is often more effective than consuming large amounts in a single sitting.
One of the biggest mistakes beginners make is following advanced workout routines designed for experienced lifters. A beginner program should focus on mastering movement patterns before pursuing complex training methods.
A simple full-body routine might include:
•Squats
•Lunges
•Leg Press
•Romanian Deadlifts
•Bench Press
•Push-Ups
•Shoulder Press
•Chest Press Machine
•Rows
•Lat Pulldowns
•Assisted Pull-Ups
•Face Pulls
Check out our Home Gym eqpemts to fijnd all this exercie machines at one place
•Planks
•Dead Bugs
•Leg Raises
•Cable Rotations
Training the entire body two to three times per week provides sufficient stimulus for most beginners while allowing adequate recovery.
Find all these exercise machines in one place - Our Home Gyms Collection
Learning proper technique should be the first priority for any beginner.
Good form helps:
•Reduce injury risk
•Improve muscle activation
•Increase training efficiency
•Build movement confidence
•Support long-term progress
Many beginners become overly focused on lifting heavier weights. However, lifting with poor technique often leads to plateaus and injuries. Start with manageable weights and focus on mastering movement quality before increasing resistance.
Motivation is valuable, but excessive training can lead to burnout and injury. Beginners often believe more workouts automatically produce better results. In reality, recovery is just as important as training.
A proper warm-up prepares muscles, joints, and the nervous system for exercise.
Benefits include:
•Improved mobility
•Enhanced performance
•Reduced injury risk
•Better movement quality
Training breaks down muscle tissue, while recovery rebuilds it.
Without adequate recovery:
•Performance declines
•Fatigue increases
•Progress slows
•Injury risk rises
The answer depends on personal preferences, goals, budget, and lifestyle.
•Convenience
•Time savings
•Privacy
•Flexible workout schedules
•No waiting for equipment
•Greater equipment variety
•Professional environment
•Access to trainers
•Community atmosphere
•Specialized machines
Both options can be highly effective when paired with consistency and proper programming.
Progress in weight training can be measured in many ways. Do not rely solely on the scale.
Consider tracking:
•Strength improvements
•Body measurements
•Workout performance
•Energy levels
•Progress photos
•Muscle development
•Endurance improvements
•Mobility gains
Many beginners become discouraged because weight loss occurs slowly. However, significant positive changes may be happening beneath the surface. Building muscle while reducing body fat can result in dramatic physical improvements even when body weight changes minimally.
Motivation naturally fluctuates over time. The individuals who achieve lasting results are usually those who develop consistent habits rather than relying on motivation alone.
Strategies that support consistency include:
•Setting realistic goals
•Tracking workouts
•Celebrating small victories
•Following a structured program
•Training with a partner
•Maintaining a routine
•Focusing on progress rather than perfection
Remember that fitness is a long-term journey. Small improvements performed consistently often produce extraordinary results over time.
One of the most common beginner questions is how quickly weight training produces visible results. While individual experiences vary, many beginners notice improvements within a few weeks.
Early benefits may include:
•Increased strength
•Better posture
•Improved energy
•Enhanced confidence
•Better sleep
•Improved coordination
Visible physical changes often become more noticeable after several months of consistent training and proper nutrition. Patience is essential. The most impressive transformations are typically the result of sustained effort over time.
Weight training offers benefits that extend well beyond aesthetics.
Long-term advantages include:
•Stronger muscles
•Healthier bones
•Improved cardiovascular health
•Better balance
•Enhanced mobility
•Reduced injury risk
•Improved metabolism
•Greater independence with age
•Better mental well-being
•Improved quality of life
These benefits continue accumulating for years, making weight training one of the most valuable investments you can make in your health.
Also read: Abu Dhabi fitness Initiatives
Absolutely.
Many people mistakenly assume that cardio is the only effective exercise for fat loss.
Weight training supports weight management by:
•Preserving lean muscle mass
•Increasing calorie expenditure
•Improving metabolic rate
•Enhancing body composition
•Supporting long-term fat loss
The combination of strength training, cardiovascular exercise, and proper nutrition often produces the most sustainable results.
Weight training is beneficial throughout life.
•Build strength
•Improve athletic performance
•Develop healthy habits
•Maintain muscle mass
•Support metabolism
•Reduce chronic disease risk
•Preserve independence
•Improve balance
•Reduce fall risk
•Support bone health
Regardless of age, properly structured resistance training can significantly improve overall health and function.
Weight training is far more than a method for building muscle or improving appearance. It is a powerful tool that can positively influence nearly every aspect of your life, from physical health and mental well-being to confidence, mobility, and long-term quality of life. For beginners, the journey may seem intimidating at first, but the fundamentals are surprisingly simple: learn proper technique, train consistently, prioritize recovery, and focus on gradual progress. Over time, these small efforts compound into significant results. Whether your goal is to lose weight, gain strength, improve athletic performance, or simply feel healthier and more capable in everyday life, weight training provides a proven path toward achieving those goals. The key is to start where you are, stay patient, and trust the process. Years from now, you may look back and realize that picking up those first weights was one of the best decisions you ever made for your health and future.
If you are looking to buy other fitness machines or accessories, look no further! Explore our range of fitness products like treadmills, elliptical cross trainers, exercise bikes, rowing machines, home gym, functional trainer, multi-station, power towers, smith machines, dumbbells, foosball tables, pool tables, and table tennis.
Pilates is more than just a fitness trend it’s a transformative movement system that strengthens, stretches, and stabilises your body. But have you ever wondered, Why Pilates moves feel so effective? What’s so special about this workout? you’re not alone.
The magic of Pilates lies in its ability to blend precision, mindfulness, and science into one seamless practice. Let’s dive into the principles that make Pilates work and why it has remained a fitness favourite for decades.
Joseph Pilates developed Pilates in the early 20th century as a method of rehabilitation and strength training. Originally called “Contrology,” Pilates was designed to improve posture, core strength, and overall body awareness. Unlike many workout programs that focus on brute force or repetitive motion, Pilates prioritises controlled movements that align the body and engage the mind.
When people talk about Pilates, they often mention the “core,” but this isn’t just about getting six-pack abs. In Pilates, the core refers to the “powerhouse,” which includes your abdominals, back muscles, pelvic floor, hips, and glutes.
Here’s why this focus on the core matters:
When you perform a Pilates move like the Hundred or a Teaser, you’re not just working your abs; you’re activating a network of muscles that work together to support your spine and limbs.
Pilates has become one of the most popular fitness methods in the world, attracting everyone from athletes and fitness enthusiasts to office workers and rehabilitation patients. Unlike many workout trends that come and go, Pilates has maintained its popularity for decades because of its unique ability to improve strength, flexibility, posture, mobility, and body awareness simultaneously.
Many people are initially drawn to Pilates because it appears gentle and accessible. However, those who try it quickly discover that Pilates is far more challenging than it looks. Controlled movements, precise breathing patterns, and constant core engagement create a workout experience that targets muscles in a way that traditional exercise often cannot.
One of the reasons Pilates continues to grow in popularity is that it delivers results without relying on heavy weights, high-impact movements, or extreme training sessions. Instead, it focuses on movement quality, muscular control, alignment, and efficient body mechanics.
But what exactly makes Pilates so effective? Why do people report improved posture, stronger cores, better flexibility, and reduced pain after consistently practicing Pilates? The answer lies in the science behind the method.
Understanding how Pilates works can help you appreciate why it has become a cornerstone of modern fitness and rehabilitation programs worldwide.
Pilates is a system of exercise developed by Joseph Pilates during the early twentieth century.
Originally known as "Contrology," Pilates was designed to improve physical strength, flexibility, posture, coordination, and mental focus through controlled movement.
The method combines:
•Precise movements
•Controlled breathing
•Core engagement
•Postural alignment
•Flexibility training
•Muscular endurance
•Mind-body connection
Today, Pilates is practiced in two primary forms:
•Mat Pilates
•Reformer Pilates
Both approaches follow the same foundational principles while utilizing different equipment and movement variations.
The effectiveness of Pilates begins with its foundational principles.
These principles guide every movement and create the framework that distinguishes Pilates from traditional exercise programs.
Pilates requires full mental engagement throughout each exercise.
Rather than moving mindlessly through repetitions, practitioners focus on movement quality, body position, and muscular control.
Benefits include:
•Improved body awareness
•Better coordination
•Enhanced movement efficiency
•Greater exercise effectiveness
Every Pilates movement is performed deliberately and with purpose.Control helps ensure that muscles are activated correctly while reducing unnecessary strain on joints and connective tissues.
The core serves as the foundation for nearly every Pilates exercise.
This central area includes:
•Abdominal muscles
•Lower back muscles
•Pelvic floor muscles
•Hip stabilizers
A strong center improves overall movement quality and stability.
Small adjustments often make significant differences in Pilates.Precise movement patterns help maximize muscular engagement while minimizing compensation patterns.
Breathing is integrated into every Pilates exercise.
Proper breathing supports:
•Core activation
•Oxygen delivery
•Movement efficiency
•Relaxation
Pilates emphasizes smooth transitions between movements.
Flow encourages coordination, balance, and overall movement efficiency.
One of the most recognized benefits of Pilates is its ability to strengthen the core. However, the Pilates definition of the core extends beyond visible abdominal muscles.
The core includes:
•Transverse abdominis
•Rectus abdominis
•Obliques
•Multifidus
•Pelvic floor muscles
•Diaphragm
The transverse abdominis is particularly important. This deep abdominal muscle functions like a natural corset around the torso, helping stabilize the spine and pelvis during movement. Research suggests that Pilates effectively activates these deep stabilizing muscles, contributing to improved posture, reduced back pain, and enhanced movement efficiency.
Modern lifestyles often involve prolonged sitting, screen time, and repetitive movement patterns.
These habits frequently contribute to:
•Rounded shoulders
•Forward head posture
•Lower back discomfort
•Reduced mobility
Pilates addresses these issues by strengthening postural muscles and increasing awareness of body alignment.
Key muscles targeted include:
•Upper back muscles
•Core stabilizers
•Glutes
•Shoulder stabilizers
As strength and awareness improve, many individuals naturally develop better posture during daily activities.
Pilates does more than strengthen muscles. It also improves communication between the brain and the body. This relationship is known as neuromuscular coordination.
Better neuromuscular function leads to:
•Improved balance
•Enhanced coordination
•More efficient movement
•Reduced injury risk
Because Pilates emphasizes precise movement patterns, the nervous system learns to recruit muscles more effectively. This can improve both athletic performance and everyday functional movement.
Traditional strength training often focuses on moving external resistance. Pilates focuses on controlling the body itself.
Instead of asking: “How much weight can I lift?”
Pilates asks: "How well can I control my movement?"
This shift in focus creates unique benefits including:
•Improved body awareness
•Greater muscular control
•Enhanced mobility
•Better movement quality
Many people discover muscles they never knew existed after their first Pilates session.
Functional strength refers to strength that improves real-world movement and daily activities. Pilates enhances functional strength by training muscles to work together rather than in isolation.
Benefits include:
•Improved lifting mechanics
•Better balance
•Enhanced mobility
•Greater joint stability
•Reduced injury risk
Functional strength becomes especially important as individuals age and seek to maintain independence.
Breathing plays a central role in Pilates effectiveness.Unlike shallow chest breathing commonly associated with stress, Pilates encourages deeper and more intentional breathing patterns.
Benefits include:
•Improved oxygen delivery
•Enhanced core activation
•Reduced tension
•Better movement control
Breathing also supports the mind-body connection that distinguishes Pilates from many traditional exercise programs.
Also Read: Can Weight Training Change Your Life? Here is what beginners should know
Flexibility improvements are among the most noticeable benefits reported by Pilates practitioners. Many exercises move joints through full ranges of motion while simultaneously strengthening supporting muscles.
This combination helps improve:
•Hip mobility
•Spinal mobility
•Shoulder flexibility
•Hamstring flexibility
•Overall movement quality
Unlike passive stretching alone, Pilates develops active flexibility that translates into everyday movement.
Low-impact exercise places minimal stress on joints while still providing meaningful fitness benefits.
Pilates achieves this by:
•Avoiding repetitive impact forces
•Emphasizing controlled movement
•Supporting proper alignment
•Promoting muscular balance
This makes Pilates suitable for:
•Beginners
•Older adults
•Athletes
•Individuals recovering from injury
Many injuries result from muscular imbalances, poor movement mechanics, and insufficient stability.
Pilates addresses these factors by:
•Strengthening stabilizing muscles
•Improving mobility
•Enhancing balance
•Promoting proper alignment
These adaptations may help reduce injury risk during both exercise and daily activities.
Professional athletes across numerous sports incorporate Pilates into their training programs.
Benefits may include:
•Improved core strength
•Enhanced mobility
•Better balance
•Greater body control
•Reduced injury risk
Athletes often find that Pilates complements traditional strength and conditioning programs by addressing movement quality and stability.
Pilates can support a wide variety of goals including:
•Improving posture
•Increasing flexibility
•Developing core strength
•Enhancing mobility
•Supporting rehabilitation
•Reducing stress
•Improving athletic performance
•Building muscular endurance
This versatility contributes significantly to its widespread appeal.
Check out: GCC Certified Pilates Certification
Pilates was originally developed by a man and was initially used by athletes, dancers, and military personnel.
While low impact, Pilates can be highly challenging due to its emphasis on control and precision.
Pilates incorporates strength, stability, mobility, coordination, and endurance training.
Pilates effectively develops muscular strength and endurance, particularly within stabilizing muscle groups.
Results vary depending on consistency, frequency, and individual goals.
Many practitioners report improvements such as:
•Better posture within weeks
•Increased flexibility within weeks
•Enhanced core strength within weeks
•Improved body awareness within weeks
Long-term benefits continue developing with regular practice.
Pilates addresses many modern health challenges.
It helps combat:
•Poor posture
•Sedentary lifestyles
•Stress
•Reduced mobility
•Muscular imbalances
Its adaptability allows people of all ages and fitness levels to participate and benefit.
Unlike traditional workouts where you might do endless reps of the same exercise, Pilates emphasizes doing fewer movements with perfect form. This focus on precision ensures:
For example, when performing the Roll-Up, it’s not about how quickly you can sit up. Instead, it’s about controlling the movement from start to finish, engaging your core, and articulating your spine.
Pilates is famously gentle on the joints while being incredibly effective. How does this combination work?
This low-impact nature makes Pilates an excellent choice for people of all ages, including seniors and those with physical limitations.
One of the most unique aspects of Pilates is its ability to strengthen not only the body but also the connection between the mind and movement. Unlike many forms of exercise where repetitions are performed quickly or with minimal awareness, Pilates requires complete focus on posture, breathing, alignment, and muscular engagement throughout every exercise. This heightened awareness encourages practitioners to become more conscious of how their bodies move and respond during both workouts and daily activities.
The mind-body connection developed through Pilates can have a significant impact on overall well-being. Many people spend long hours sitting at desks, using electronic devices, or performing repetitive movements without paying attention to posture and body mechanics. Over time, these habits can contribute to muscle imbalances, stiffness, discomfort, and reduced mobility. Pilates helps counteract these issues by teaching individuals to move with greater awareness and control.
Research has shown that mindful movement practices can contribute to reduced stress levels and improved mental clarity. The controlled breathing techniques used in Pilates help activate the body's relaxation response, allowing practitioners to feel calmer and more focused after a session. This combination of physical activity and mental concentration makes Pilates an effective tool for managing the demands of modern life.
Another reason Pilates produces such noticeable results is its emphasis on movement efficiency. Every exercise is designed to encourage proper alignment and optimal muscle recruitment. Rather than relying on momentum, practitioners learn to engage the correct muscles at the correct time. This can improve movement quality during everyday tasks such as walking, lifting, bending, reaching, and climbing stairs.
Pilates also promotes muscular balance throughout the body. Many traditional workout programs focus heavily on major muscle groups while neglecting smaller stabilizing muscles. Pilates addresses both, helping create a more balanced and functional physique. Improved muscular balance often translates into better posture, enhanced athletic performance, and reduced risk of overuse injuries.
For individuals pursuing long-term fitness goals, Pilates can serve as an excellent complement to other forms of exercise. Strength athletes, runners, cyclists, swimmers, and team-sport athletes often use Pilates to improve mobility, core stability, and body control. By enhancing movement efficiency and joint stability, Pilates can support better performance across a wide range of physical activities.
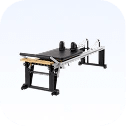
While Pilates can be practiced using body weight alone, specialized equipment can significantly enhance the effectiveness and variety of your workouts. A high-quality Pilates mat provides the foundation for many core-strengthening, flexibility, and mobility exercises, offering comfort and support during floor-based movements. The Pilates ring, also known as a magic circle, adds gentle resistance to exercises, helping activate deeper stabilizing muscles while improving strength, coordination, and body control. For those seeking the most comprehensive Pilates experience, Pilates reformers use adjustable spring resistance to create hundreds of exercise variations that challenge strength, balance, flexibility, and endurance simultaneously. Together, Pilates mats, rings, and reformers help practitioners of all fitness levels perform movements with greater precision, making it easier to build core strength, improve posture, increase flexibility, and experience the full benefits of the Pilates method.
Perhaps one of the greatest advantages of Pilates is its accessibility. The exercises can be modified for beginners, older adults, athletes, and individuals recovering from injuries. As strength, flexibility, and coordination improve, movements can be progressed to provide greater challenges and continued results. This adaptability allows Pilates to remain effective throughout different stages of life and fitness.
Ultimately, the science behind Pilates demonstrates that fitness is not solely about lifting heavier weights or performing high-intensity workouts. It is also about moving well, maintaining balance, developing body awareness, and building a strong foundation for lifelong health. Through consistent practice, Pilates helps individuals create a body that is not only stronger and more flexible but also more resilient, efficient, and capable of meeting the physical demands of everyday life.
One of the standout features of Pilates is its focus on the mind-body connection. Each move requires mental focus to coordinate breathing, alignment, and muscle engagement. This mindful approach offers several benefits:
For example, when performing the Spine Stretch Forward, the breath guides the movement, helping you connect with your body and maximize the stretch.
Pilates uniquely combines flexibility and strength in every move. Rather than bulking up specific muscle groups, Pilates creates long, lean muscles by integrating stretching and strengthening simultaneously.
This dual benefit is why Pilates enthusiasts often report feeling taller, lighter, and more aligned after a session.
Breathing is a cornerstone of Pilates, and it’s not just about inhaling and exhaling—it’s about breathing with purpose.
For instance, in the Hundred, the rhythm of your breath complements the pulsing arm movements, ensuring you stay energized throughout the exercise.
Pilates is designed to improve the way you move in real life, not just during workouts. Its focus on alignment, posture, and core strength translates to:
While mat Pilates is highly effective, equipment like the Reformer, Cadillac, or Wunda Chair adds variety and challenge. These tools use springs and pulleys to:
For example, the Reformer’s sliding carriage allows for fluid movements that challenge your core and limbs simultaneously.
Pilates isn’t just a workout—it’s a practice that delivers lasting benefits:
These results aren’t limited to the studio; the principles of Pilates can transform the way you approach movement and self-care in every aspect of your life.
Pilates works because it’s more than just exercise, it’s a mindful, science-backed system that trains your body to move smarter, not harder. By focusing on the core, precision, and mind-body connection, Pilates creates a strong foundation for fitness and wellness.
Whether you’re new to Pilates or a seasoned practitioner, its benefits will leave you feeling stronger, more balanced, and empowered.
So, why not give it a try? Unroll your mat or hop on a Reformer and experience the magic of Pilates for yourself!
Pilates has earned its reputation as one of the most effective and sustainable fitness methods because it combines science-backed principles of strength, stability, flexibility, breathing, and movement control into a single training system. Rather than focusing solely on appearance or calorie burning, Pilates improves the way the body functions as a whole. Through consistent practice, individuals often experience stronger core muscles, better posture, improved flexibility, enhanced balance, reduced discomfort, and greater body awareness. Whether performed on a mat or specialized equipment, Pilates provides a low-impact yet highly effective approach to fitness that supports long-term health and well-being. The science behind Pilates demonstrates that small, controlled movements can produce powerful results, making it a valuable addition to virtually any fitness routine.
If you are looking to buy other fitness machines or accessories, look no further! Explore our range of fitness products like treadmills, elliptical cross trainers, exercise bikes, rowing machines, home gym, functional trainer, multi-station, power towers, smith machines, dumbbells, foosball tables, pool tables, and table tennis.
 Setup Your Space
 Cardio
 Strength
 Weights
 Benches
 Game tables
 Boxing
 Yoga
Yoga
 Sports
 Massagers
 Balance Training
 Accessories
 Flooring


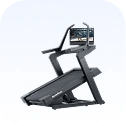 Treadmills
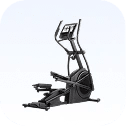 Elliptical Cross Trainers
 Exercise Bikes
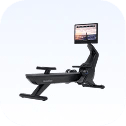 Rowing Machines
 Climbmill & Steppers
 Interactive Trainers
 Athletics
 Padel Tennis
 Handball
 Cricket
 Football
 Badminton
 Chess
Chess
 Swimming
 Tennis
 Rugby
Rugby
 Agility Training
 Netball
 Volleyball
 Kids Games
 Throwball
 Basketball
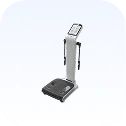
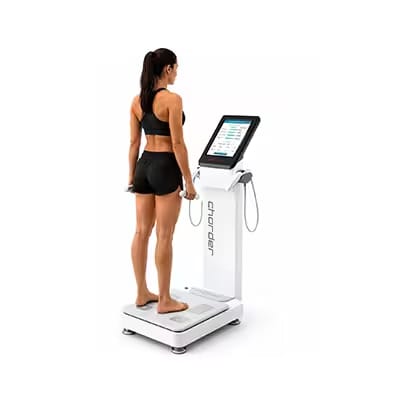 Body Composition Analyzers
 Bottles & Hydration
 Training & Gym Gloves
 Battle Ropes
 Wellness Support
 Resistance Bands & Tubes
 Ankle and Wrist Weights
 Exercise Mats and Gym Mats
 Fitness Belts
 CrossFit Training Turf
 Sweatbands
 Sit Up Bars
 Skipping Ropes
 Push Up Bars
 Pedometers
 Suspension Slings
 Hula Hoops
 Stopwatch
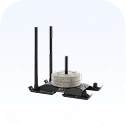
 Pull Up Bars
 Timer
Timer
 Aerobic Steps
 Weighted Vests
 Plyo Box
 Door Gyms
 Gym Balls
 Gym Rings
 Fitness Tires
 Hand Grips
 Body Strengthener


 0
0